


Description
1. How to show the list of invoices in soloBizOS.Com?
To do it, you click on Billing (1) menu => Then you click on Invoices (2) sub-menu => Then you can see list of invoices like Illustration 1 bellows.
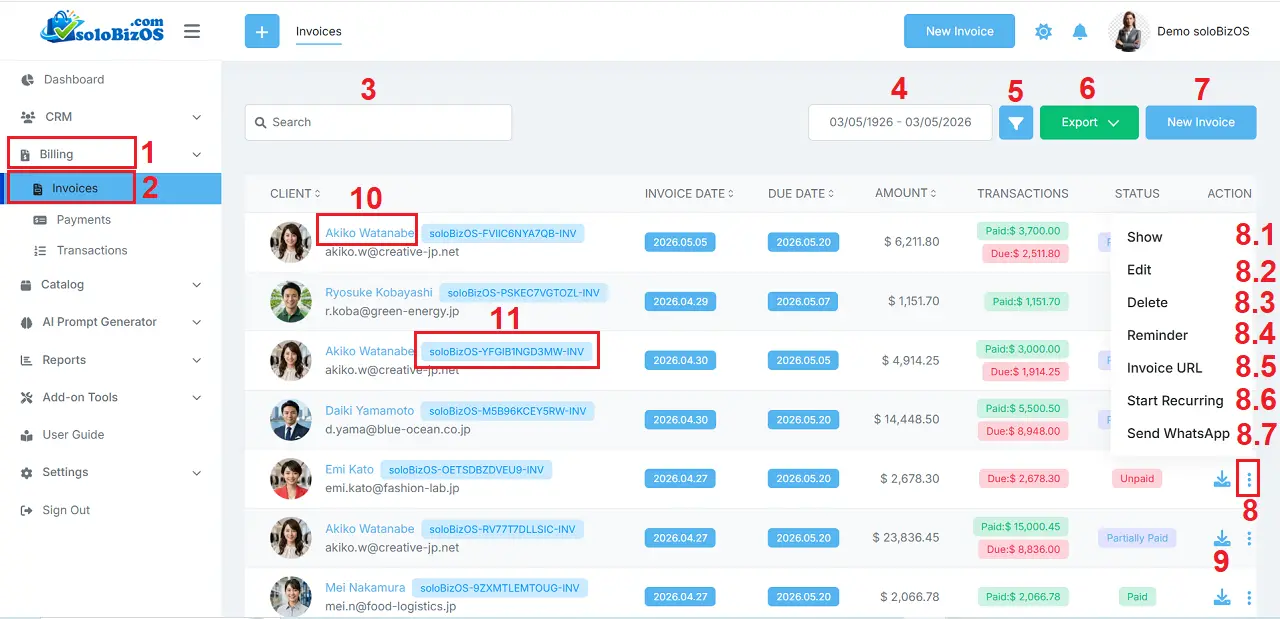
Illustration 1: List of Invoices in soloBizOS.Com
+ Search box (3) & Date Range box (4) & Filter button (5): It's used to filter data about invoices.
+ Export button (6): It's used to export your list of invoices to PDF or Excel format.
+ New Invoices button (7): It's used to create a new invoice.
+ Action icon (8): When you click on this icon then you can see all options from 8.1 to 8.7 like Illustration 1 above.
- Show option (8.1): It's used to show your invoice details.
- Edit option (8.2): It's used to modify your invoice.
- Delete option (8.3): It's used to delete your invoice.
- Remider option (8.4): It's used to send mail about the invoice due for your client.
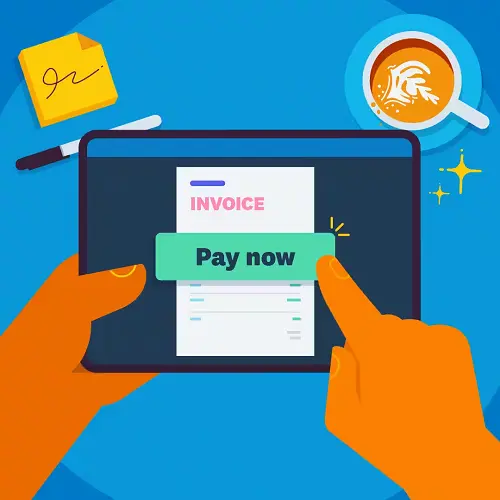
- Invoice URL (8.5): It's used to get your invoice url. Then you can send it to your client. Your client can see all things in their invoice and They can pay it from that invoice.
- Start Recurring option (8.6): It's used to change your invoice to Invoice Recurring.
- Send WhatsApp option (8.7): It's used to send your invoice details to your client via WhatsApp.
+ Download Icon (9): It's used to download the suitable invoice details.
+ 10th red box: You click on this box to show your client details.
+ 11th red box: You click on this box to show the invoice details.
2. How to create a new invoice in soloBizOS.Com?
In Illustration 1 above, you click on Add Invoice (7) button => In Add Invoice Form, you need input or select the suitable values for all box in this form => Final, you click on SAVE AS DRAFT button or SAVE AND SEND button to finish.
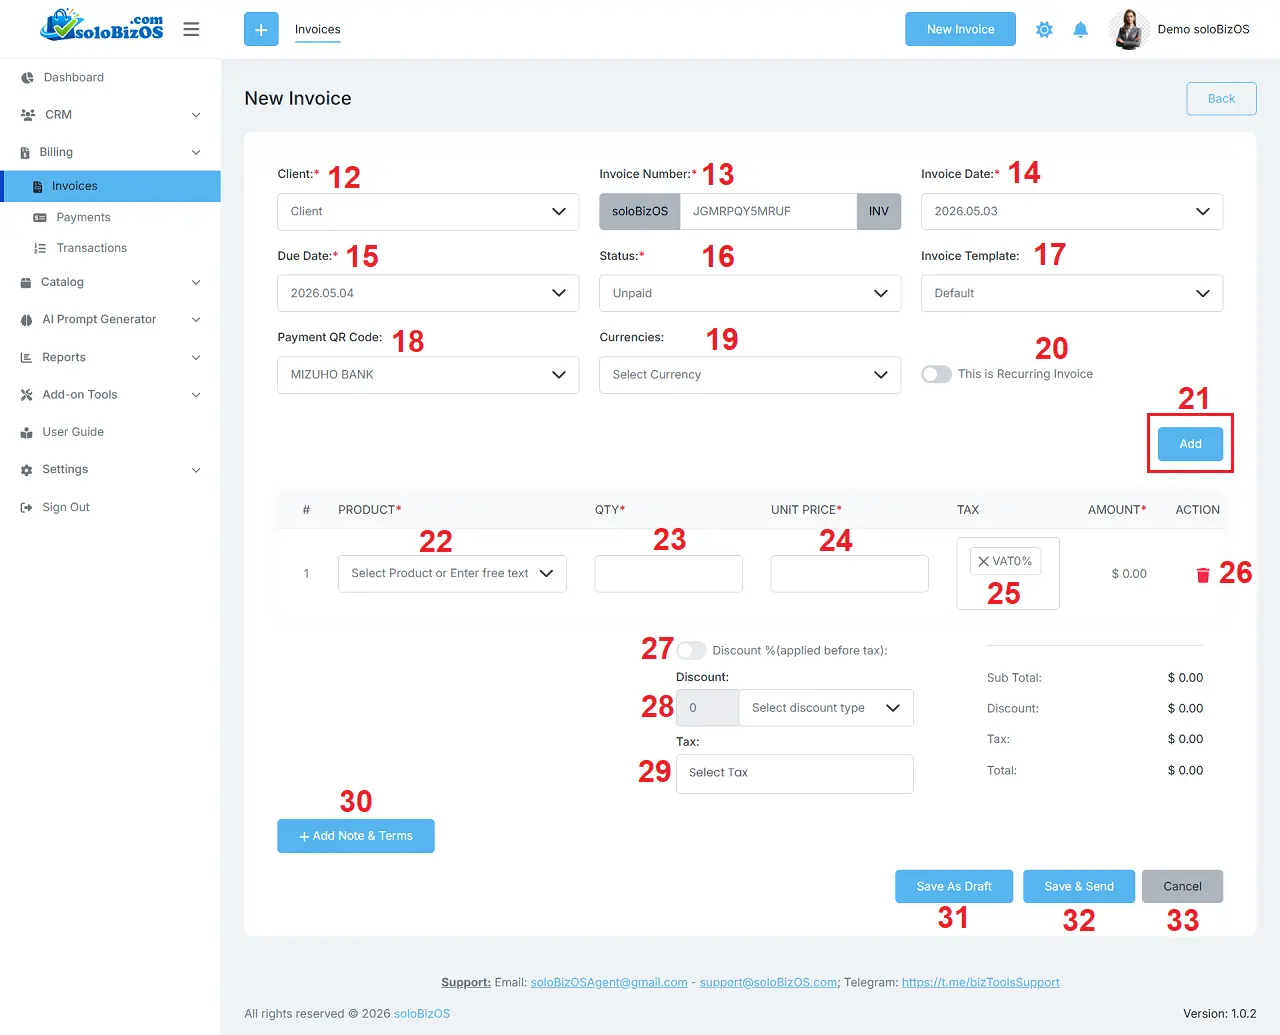
Illustration 2: Create a new invoice
* Notes:
+ This is Recurring Invoice (20) option: Turn on this option to convert your invoice to Invoice Recurring.
+ ADD button (21): Click on this button to add new row for table bellows.
+ Add Note & Term (30): You click on this button to add note & term for this invoice.
+ Save As Draft (31) button: When you click on this button so it's saved this invoice with its status is draft.
+ Save & Send (32) button: When you click on this button to save this invoice and send its detail for your client via email.
3. How to convert Invoice to Invoice Recurring in soloBizOS.Com?
In Illustration 1 above, you click on Action (8) icon that's suitable with the invoice which you want to process => Then you click on Start Recurring (8.6) option => After that your invoice is turn on to Invoice Recurring.
* Notes: To turn off the invoice recurring, you do it again.
*For any questions, please contact us via Email: soloBizOSAgent@gmail.com Or support@soloBizOS.com Or Contact us via Form CONTACT for a prompt response.